Finishing touches make all the difference
With thousands of size, paper, cover, and finishing combinations available how do you know what’s best for your book? After years of watching books pass through Momento’s facility, our co-founder Libby, gives some advice on the different options and how to create the perfect presentation package.
"When it came to choosing the materials for our photo book recording our recent walkabout in the the Kimberley, Western Australia, there were plenty of ways to approach it, but I wanted to find the most appropriate and meaningful."
What format or orientation?
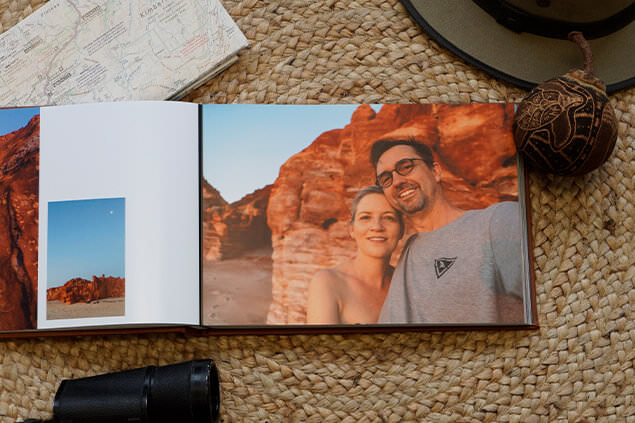
The first decision was whether the book deserved to be designed in landscape, portrait or square format. We took lots of photos of rock formations, waterholes, and red dirt landscape, so the majority of our photos were wider rather than taller. A landscape orientation book would therefore suit our photos best and would drop in more naturally.

What size?
I ruled out Small straight away because at 210W x 148H mm (A5) it wouldn’t do our travel photos justice. And although it would look amazing in Grand size 420W x 297H mm (A3), it wasn’t practical as the coffee table in our apartment isn’t huge. Regular size 297W x 210H mm (A4) seemed best as it would fit our bookshelf, and we could easily carry it around to show family.
What cover works best?
There’s no right or wrong answer but there are some questions you can ask to narrow down the options. Do you want to show off your photography from first glance, or you’re more interested in how the book feels?
Printed cover?
If you want your photography to shine then a printed cover is for you. Next you need to decide whether you want the high impact shiny lustre of a gloss laminate finish (right), or a sophisticated, smooth-to-touch matte finish (left). Given the brilliant colour of the dirt, and the constant sunshine we enjoyed throughout our trip, I felt a gloss finish was best for our book.
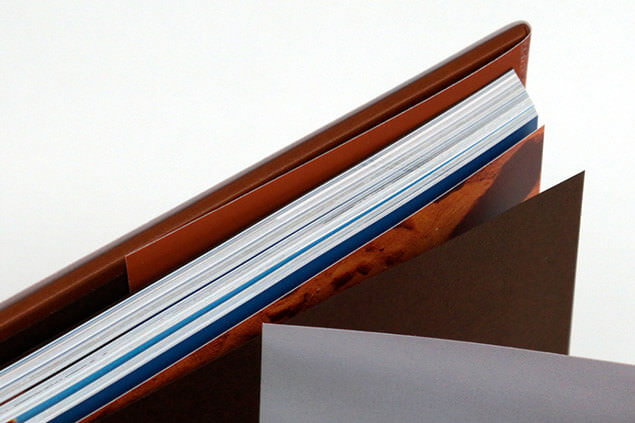
A material cover?
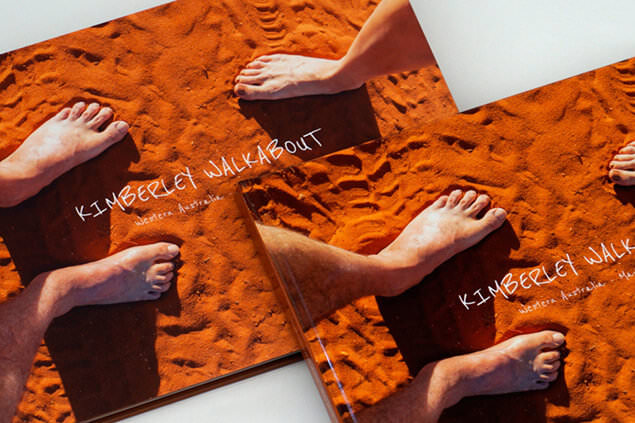
If you’re all about the feels, one of our 35+ materials might be better. An obvious choice to me was the lightly stippled, Deluxe Rust replica leather, that looked and felt just like the red dirt of the roads we drove along.
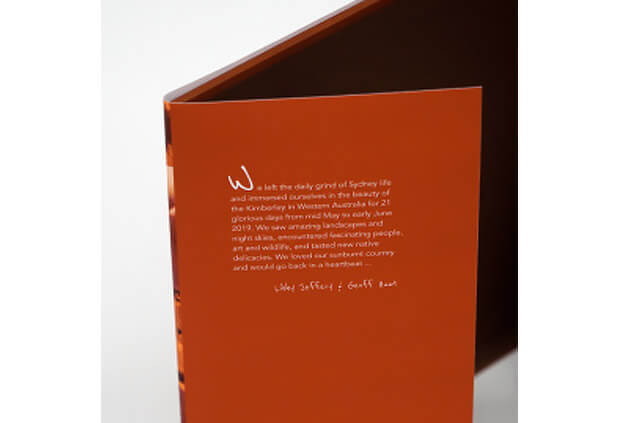
Text Embossing
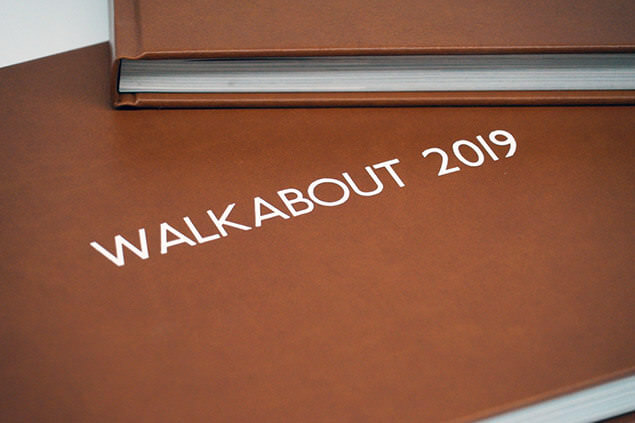
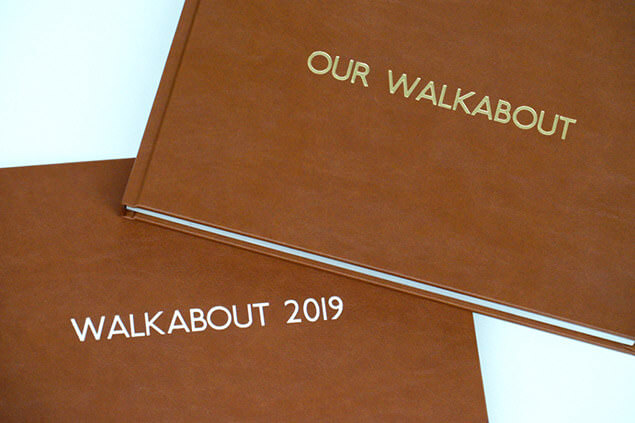
Then there’s the choice of adding text embossing or not? I’m a fan of text for context, and a title is the easiest way to set the tone for anyone reading your book. The Kimberley, Kimberley 2019, Our Walkabout, are all valid but I went with Walkabout 2019, because we learnt a lot about aboriginal culture while we were out there, and a date will be helpful in the future.
Emboss colour?
Gold foil reflects the warm tones of the Kimberley that we saw regularly in the landscape, while white foil matches the text on the book’s title page, and is used throughout the book. You could easily go either way. See all our emboss colours here, and make your choice when you place your order.
End Page colour?
White end pages work with any book design, and I considered black, but they seemed too formal for a casual holiday book. I ended up choosing Chocolate Brown end pages because they matched the colour scheme of the book, and made the book feel more professional, like something you’d find in a bookstore. See all our end page options here.
Dust-jacket?
If your aim is to make your book look like a professional coffee-table book, a dust-jacket certainly adds to the effect. It also gives you the opportunity to add a bio or summary to the back and front flaps more, so the reader learns something even before turning a page. The other benefits are that the book is better protected, and spine text allows it to be easily found on the shelf.
What paper?
Aha! This is the million dollar question we get asked, and interestingly money does come into the equation. Once again you need to be clear on what you’re trying to achieve with your book. Are you aiming to create the best showcase for your photos? Simply wanting to preserve a moment in print? And do you have a budget to stick to?
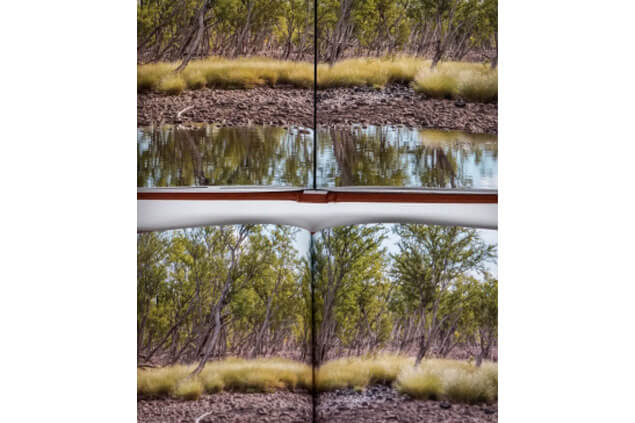
Satin 170 paper and side sewn binding
Satin is easily the most popular and versatile stock in our paper range. That’s because, even though it’s the most affordable option, it’s amazing quality and works with all colours, tones and subjects. Our Satin 178, Eggshell 148 and Lustre 190 papers all require side sewn binding which gives your book a curved gutter. As you can see in the image above, the thicker the book, the more that gets lost in the gutter.

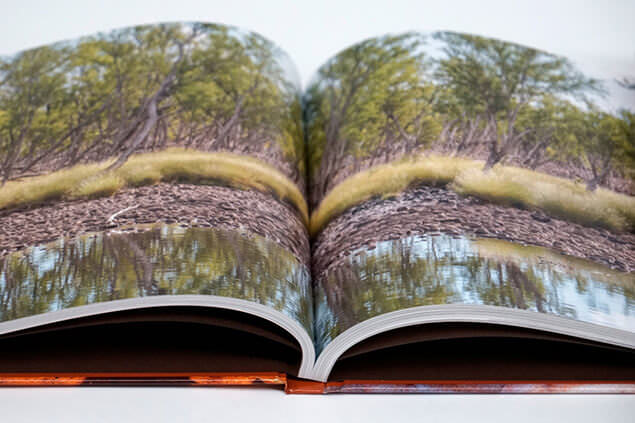
Lay-flat paper and binding
Lay-flat paper is the result of recent advances in paper creation, and as its name suggests, the pages sit flatter because of the flexible hinge inserted into the paper. No surprises then that this is our most expensive stock. We chose Lay-flat paper because we spanned a lot of photos across two pages, and didn’t want to lose any of the image in the gutter.

To box or not?
In the same way that a dust jacket gives your book more protection, so does a box. We chose a Deluxe Rust Clamshell Box for our copy, but we changed up the text embossing with The Kimberley on the box cover and Walkabout 2019 on the book. We also printed copies to give to our mums, and placed them in a Gift Box, because it felt more like a present.
We hope this gives you some insight into how your material choices and the finishing touches really do make all the difference to how your photos will be presented and perceived. So keep these considerations in mind if you want to create the perfect package for your photos and photo book.
Explore more photo book inspiration