How to make photo stationery
Creating personalised photo stationery is super fast and easy using the readymade templates in Momento’s software. Just click the related button in Start View then you'll be prompted to confirm your formatting preferences. Once you've made your selection, the software will generate a layout that you can edit at any time.
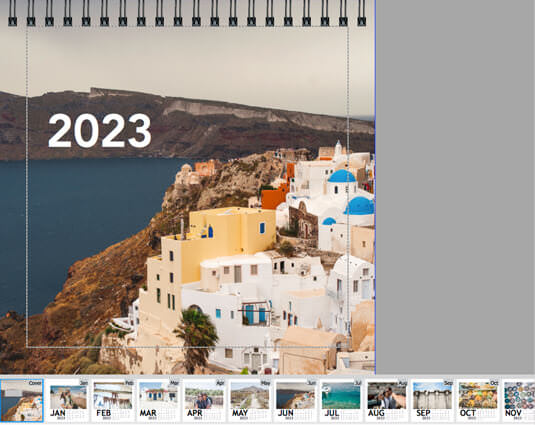
Make a photo wall calendar
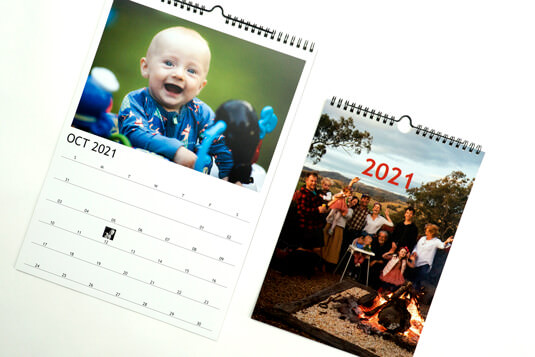
A Wall Calendar makes a great Christmas gift, and it takes only 5 minutes to create with Momento's calendar software templates. See our Calendar range.
step-by-step guide
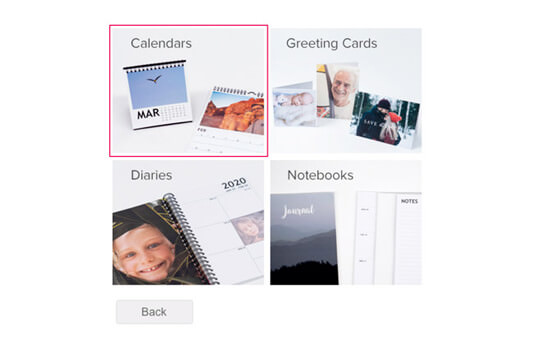
1. In Start view choose Stationery.

2. Then select Calendars
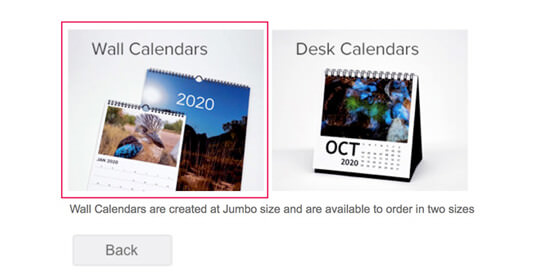
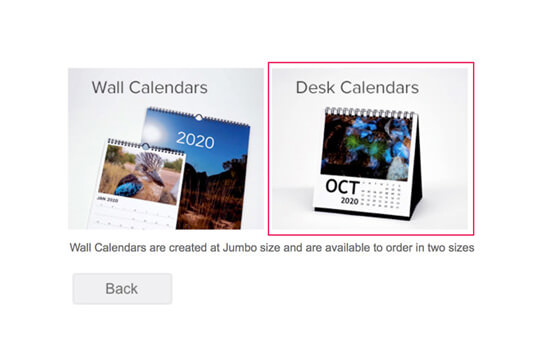
3. Choose Wall calendars to create a large format calendar for hanging.
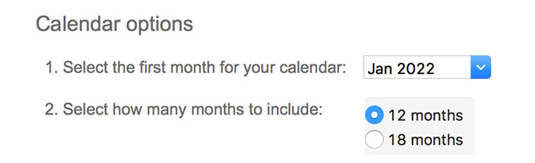
4. Select the month your calendar will start and how many months it will span.
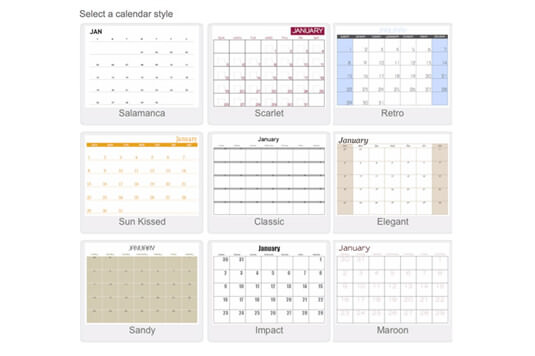
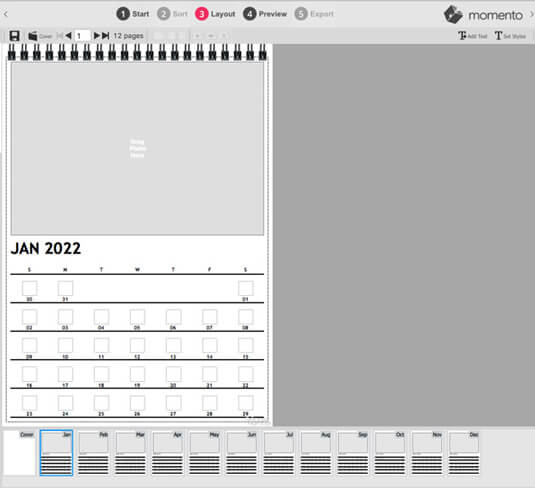
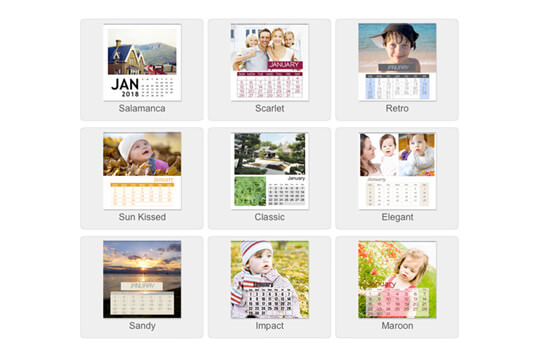
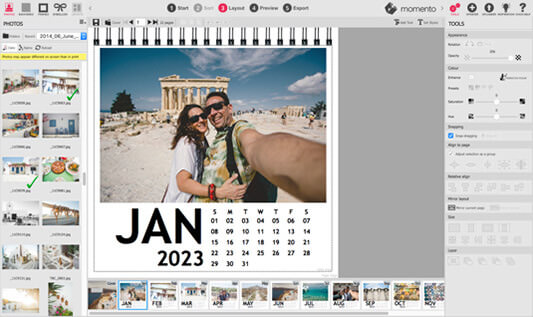
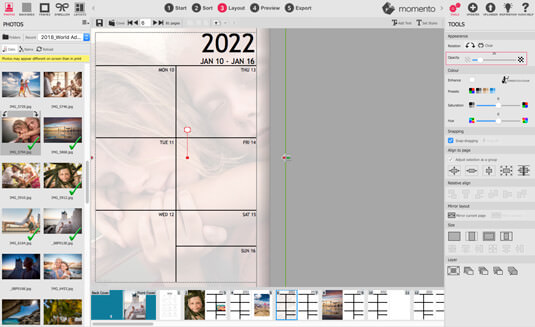
5. Then click the icon for your preferred Calendar Style. The software includes nine layout options that present the month name, photo placeholders and dates in a range of design themes with classic and contemporary fonts, colours and placement for landscape, square and portrait photos.
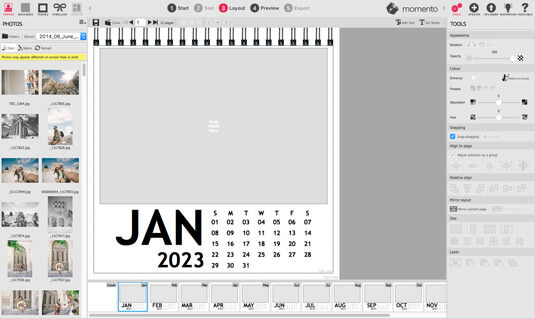
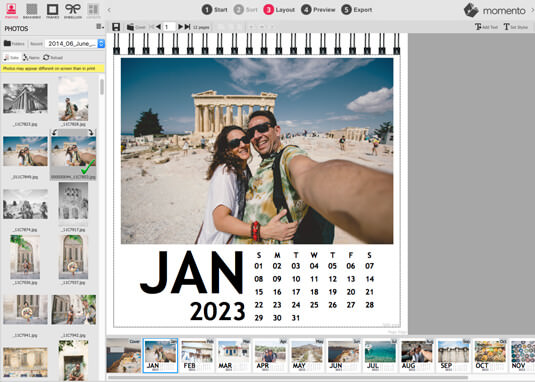
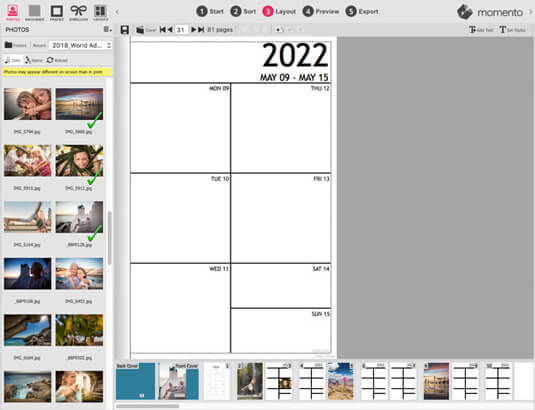
6. The software generates each calendar page and moves you into Layout View where you can add your content. Most designs include a single landscape photo placeholder, but some include two portrait orientation placeholders.
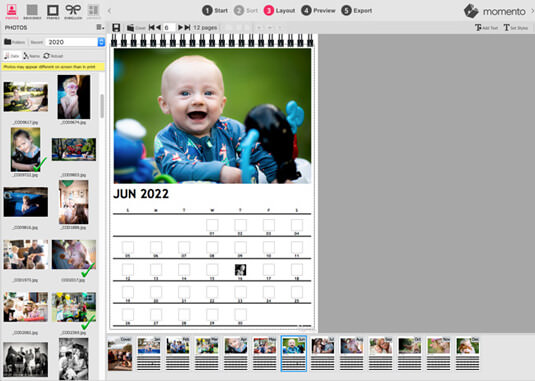
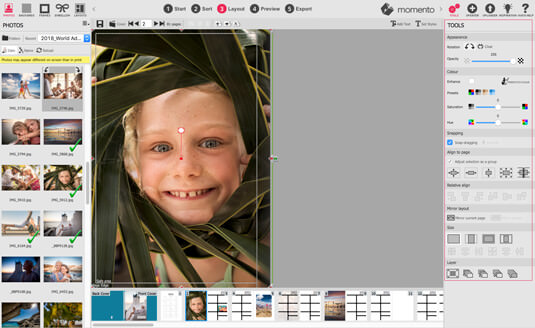
7. To add photos to the main monthly placeholder simply drag and drop in an image from the Photo Panel on the left.
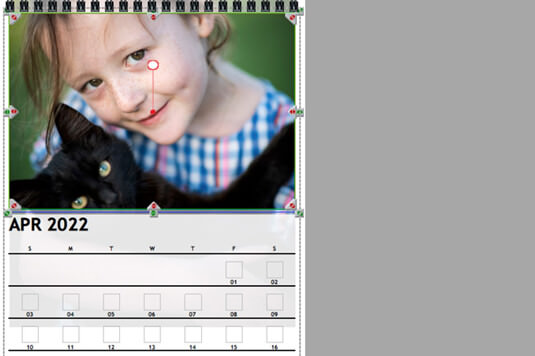
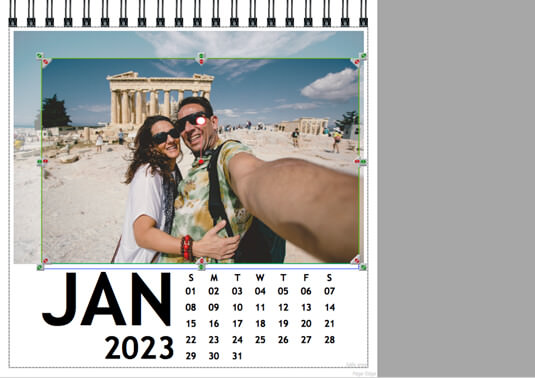
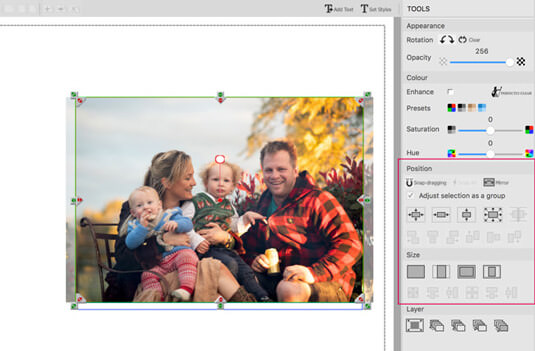
8. To adjust the position of a photo dropped into a placeholder, click the photo, move the cursor outside the placeholder area until the hand icon appears then drag the photo around to recrop it.
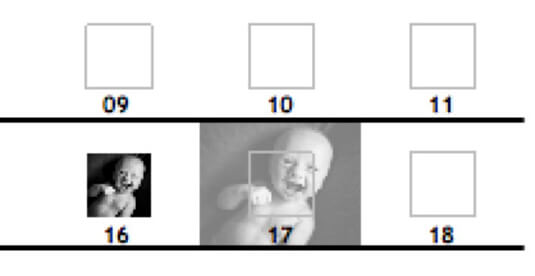
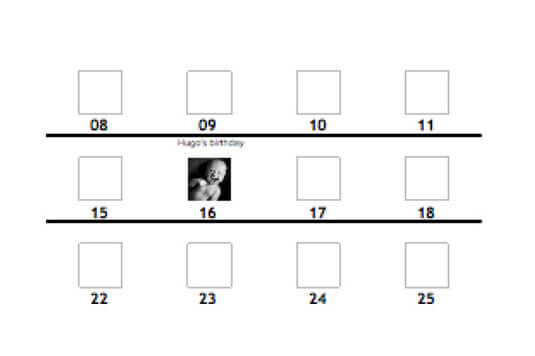
9. Highlight birthday's by adding photos to their special day. You have two options to fill the small square in the centre of each day or the whole day's area. Drag the photo over the square and a blue line will highlight its landing position. Release the cursor to lock the photo into position.
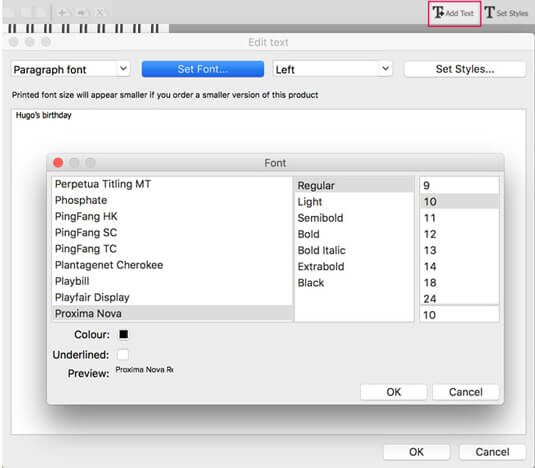
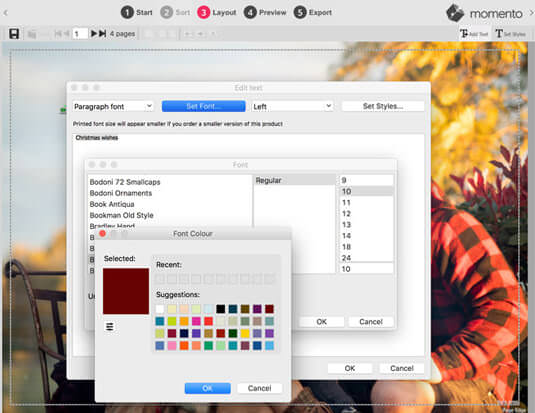
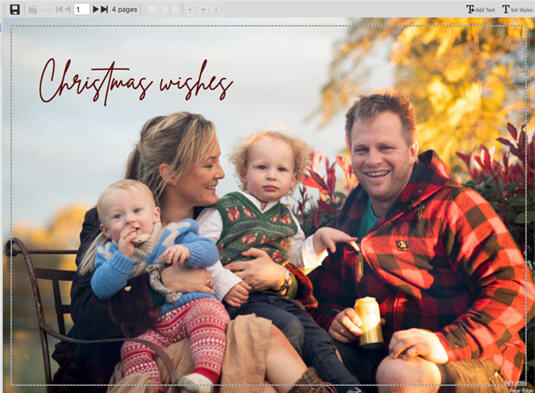
10. You can also insert text by clicking the Add Text button at the top right of the software. Place the cursor in the location you'd like the text to appear then type into the text window. Set the font, size, colour and alignment. Click and drag the text box to reposition, and use the green arrows to change the size of the text box.
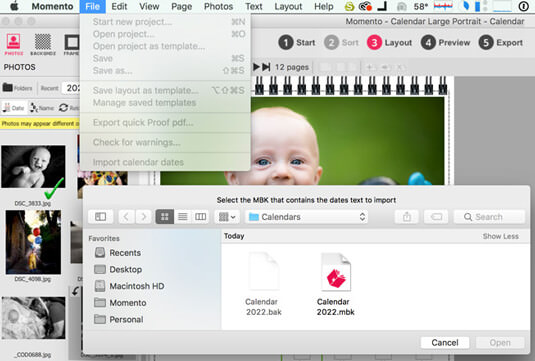
11. If you've made a calendar before and you want to import text from a previous version, use the Import Calendar Dates in the file menu.
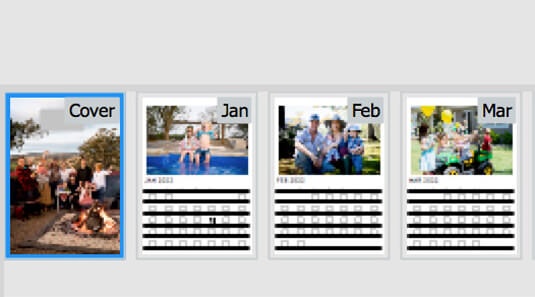
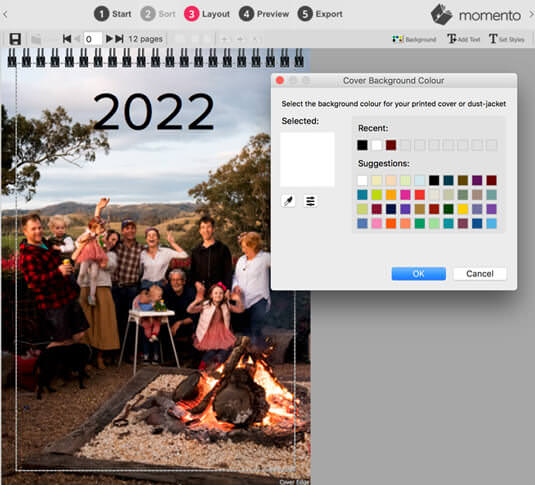
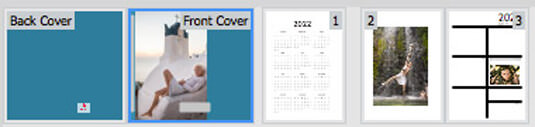
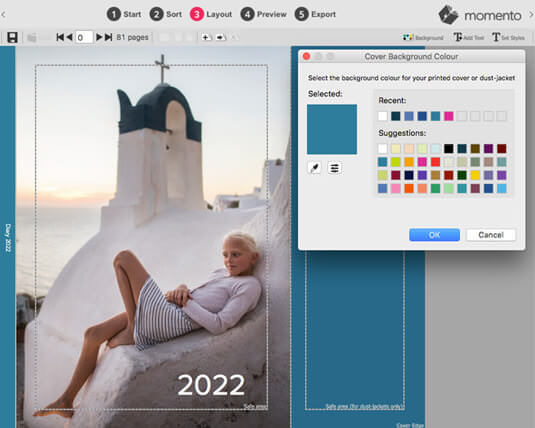
12. Design the cover by clicking the far left thumbnail at the bottom of the screen. Drop on photos and text then set the background colour by clicking the Background icon that now appears at the top of the software.
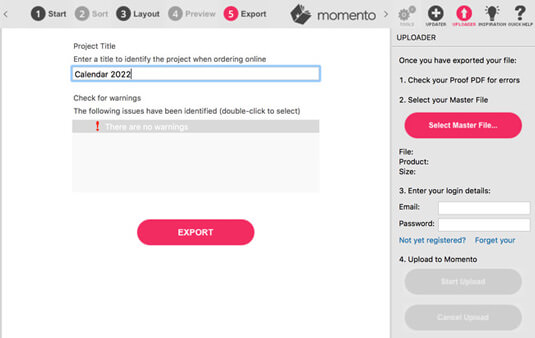
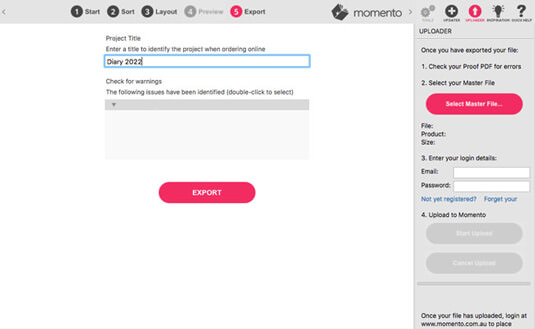
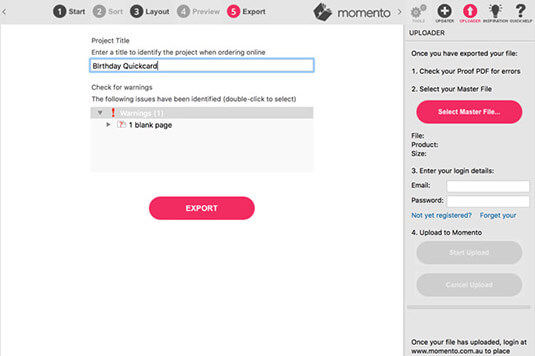
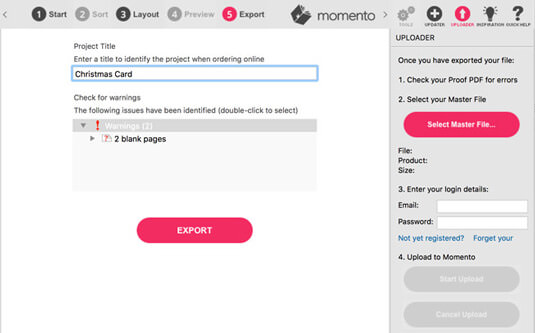
13. When your design is finished move to Export view to export your file to send to Momento, then proof, upload and place your order.
14. You can choose a Regular or Jumbo size calendar when placing your order online. Explore all Calendar product details here.

Make a photo desk calendar
A Desk Calendar is an easy way to enjoy your photos every day. See our Calendar range.
step-by-step guide
1. In Start view choose Stationery.
2. Then select Calendars
3. Choose Desk Calendars to create a small A-frame calendar.
4. Select the month your calendar will start and how many months it will span.
5. Then click the icon for your preferred Calendar Style. The software includes nine layout options that present the month name, photo placeholders and dates in a range of design themes with classic and contemporary fonts and colours.
6. The software generates each calendar page and moves you into Layout View where you can add your content.
7. To add photos simply drag and drop in an image from the Photo Panel on the left.
8. To adjust the position of a photo dropped into a placeholder, click the photo, move the cursor outside the placeholder area until the hand icon appears then drag the photo around to reposition it.
9. Design the cover by clicking the far left thumbnail at the bottom of the screen. Drop on your photos and text.
10. When your design is finished move to Export view to export your file to send to Momento, then proof, upload and place your order.
Our template allows you to create a 12 month, one week per page diary. You can customise the cover and inside pages with photos and text that will provide you with daily eye candy and keep you organised. Available in Regular and Small portrait size. See all Diary details.
step-by-step guide
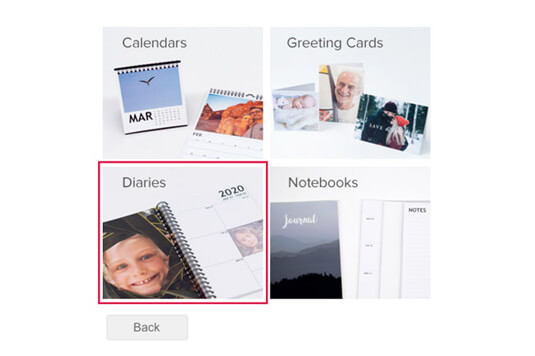
1. In Start view choose Stationery
2. In the Stationery screen select the Diaries icon
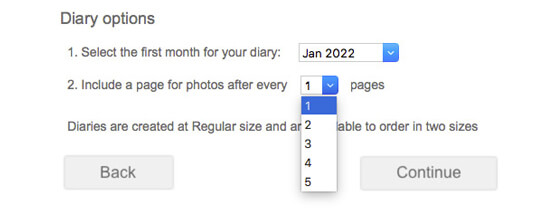
3. The Diary options screen asks you to choose a start month and whether to insert a photo page after 1, 2, 3, 4 or 5 weeks, ready for you to drop your photos in.
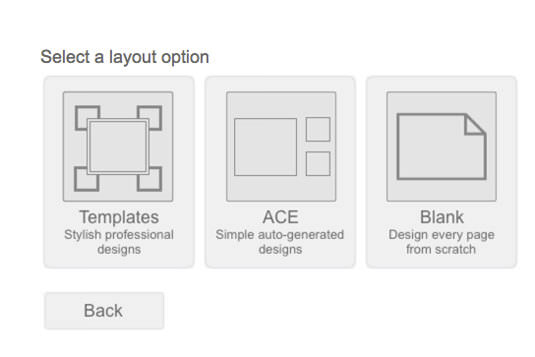
4. Then select a layout option that your photos can be automatically or manually dropped into. Templates are stylish, pre-designed page layouts, ACE auto generates random designs and Blank allows you to start from scratch.
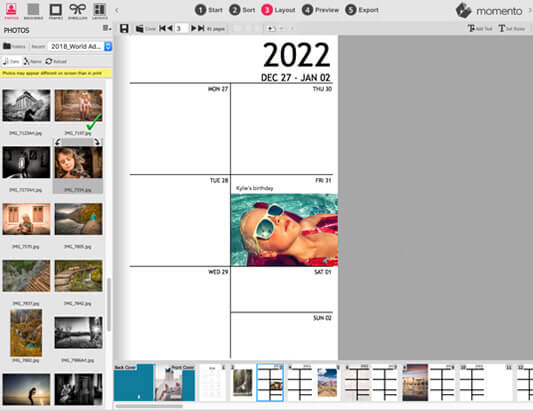
5. The software automatically generates the pages according to your settings and moves you to Layout View where you can add your content.
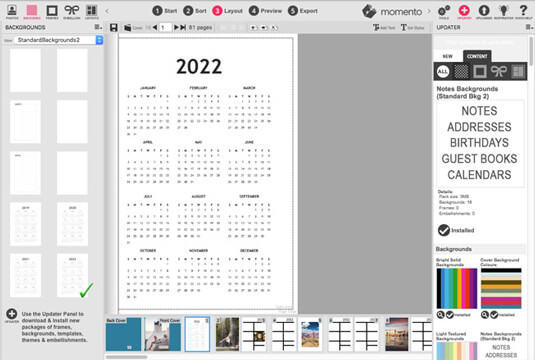
6. To start your diary with a full year calendar page, install the graphic from the StandardBackgrounds2 embellishment package via the Updater Panel on the right. Once installed the go to the Backgrounds Panel, scroll through the options then click and drag the image onto the Work Area.
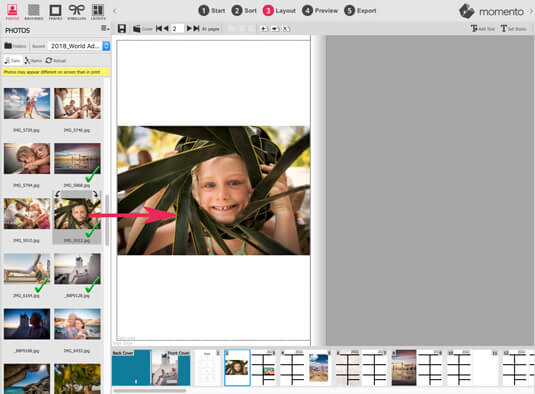
7. To add photos to a blank page or weekly grid, drag and drop the image from the Photo Panel on the left onto the canvas.
8. Use the manual editing tools or automated editing tools to position and size the photos.
9. Add a graphic to a week page and reduce the opacity with the slider on the top right, to make it easy to see handwritten text.
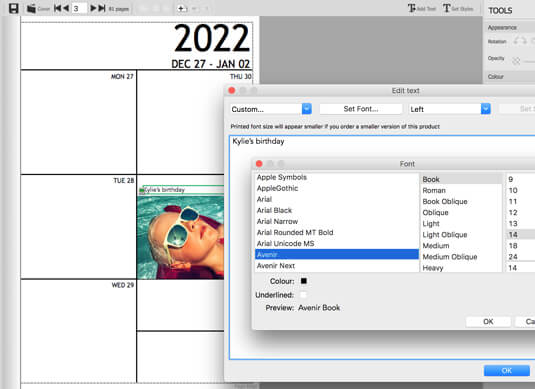
10. Use the Add Text button top right to highlight birthdays, holidays and special events.

11. Place cursor into the location you want the words to appear and enter the text into the Text Box that appears. Choose the font, size, colour and alignment.
12. Design the cover by clicking the far left thumbnail at the bottom of the screen. Drop on photos and text then set the background colour by clicking the Background icon that now appears at the top of the software.
13. After filling your pages export, proof and upload your file before ordering.
Make a photo Quickcard
Quickcards are predesigned greeting card layouts decorated with embellishments including backgrounds, frames, borders and graphics on the card cover and some inside panels. You simply drop your photos in. To view the embellishment packs including Quickcard designs visit the Embellishments Gallery.
step-by-step guide
1. In Start view choose Stationery.
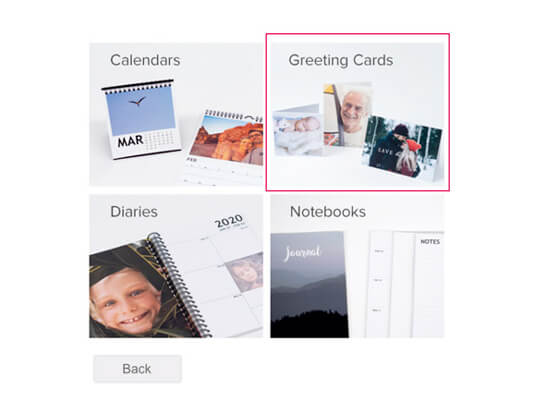
2. Then choose Greeting Cards.
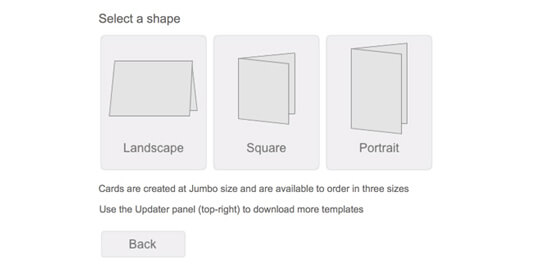
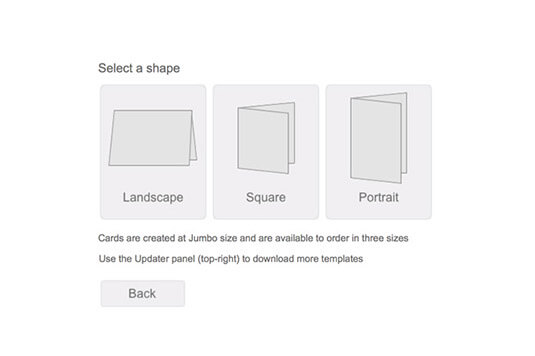
3. Then select your preferred Shape.
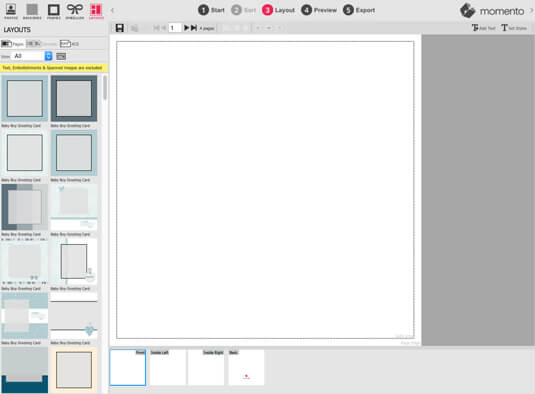
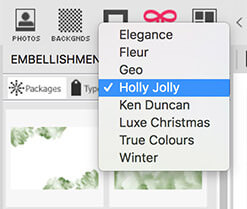
4. You will then arrive in Layout View. Click the Layouts icon top left, then Templates, to view all the installed embellishment packs. All packs with Quickcard designs will be visible in in a scrollable list.
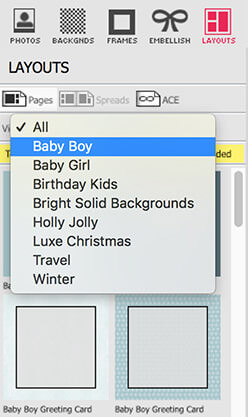
5. Filter the list to specific embellishment packs by clicking the View button.
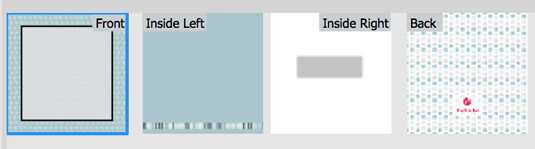
6. To apply the Quickcard design, select your preferred design then double click or drag it from the Layouts Panel to the Work Area. The Quickcard design may include the cover only, or a full card design including the cover, as well as the inside left and right panels. Placeholders are available for you to drop your photos in.
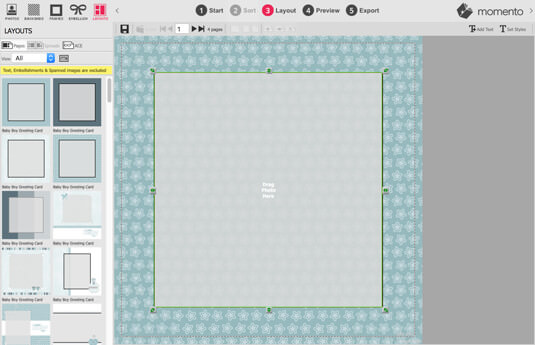
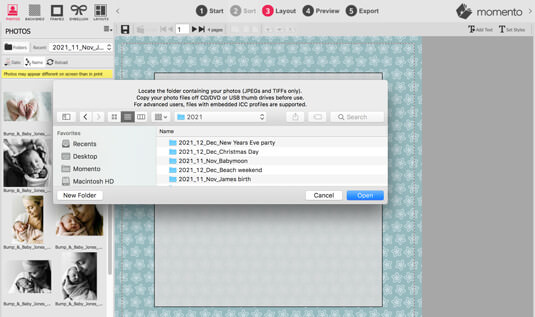
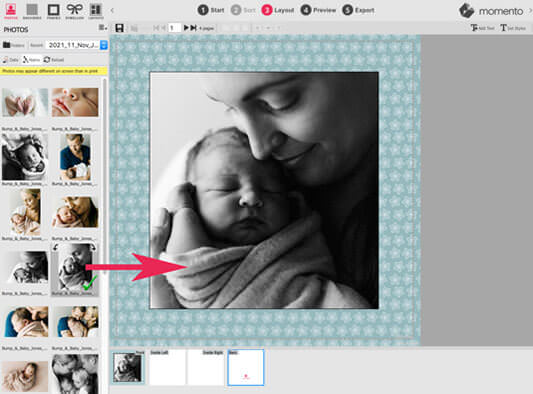
7. To add photos to the placeholders, select the Photos Panel icon top left, then click the Folders button to navigate to, and select, your source folder. All the photos in the folder will then be visible in the Photos Panel.
8. Scroll through the photos, then drag and drop your preferred photo from the Photo Panel, into the grey placeholder to take its place.
.jpg)
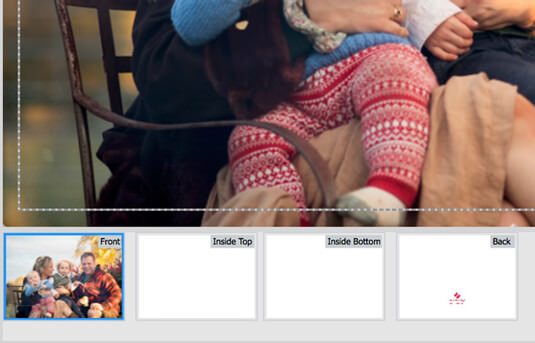
9. To decorate the inside of your card click the Inside Left or Inside Right thumbnail at the bottom of the screen.
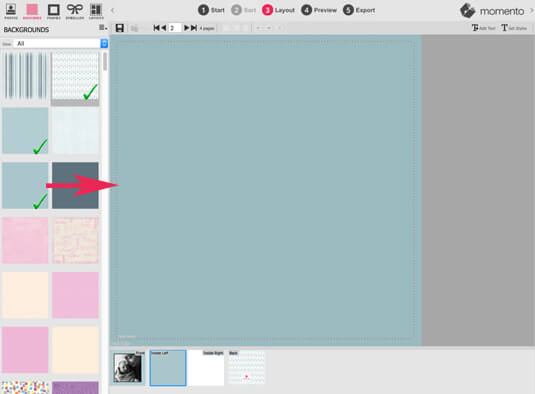
10. To add a background click the Background icon at the top of the Content Panel, then drag your preferred design on to the Canvas.
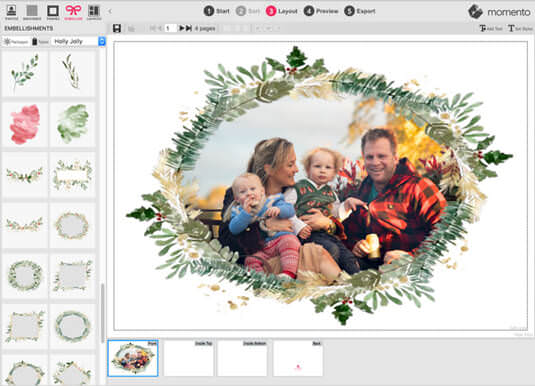
 11. To add embellishments to your design, click the Embellish icon at the top of the Content Panel, then drag your preferred graphic on to the Canvas. To learn how to add more embellishment packs and Quickcards design to the software visit our How to embellish your design page.
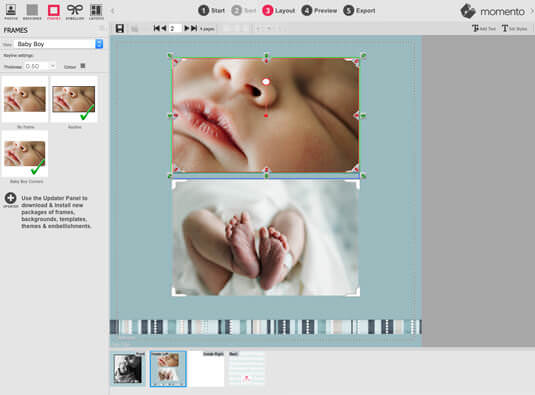
.jpg) 12. To add frames to your design, click the Frames icon at the top of the Content Panel, then drag your preferred graphic on to the photo or photos you wish to apply the frame to.
12. To add frames to your design, click the Frames icon at the top of the Content Panel, then drag your preferred graphic on to the photo or photos you wish to apply the frame to.
13. To add a personalised message click the Add Text button at the top right of the software then place the cursor where you want to the text to appear. Type the words into the text box then click the Set Font button to adjust the font, its size, colour or alignment. Click OK and you will see the words appear in your design. Drag the green arrows of the Text Box to have the words appear on a single or multiple lines.
.jpg)
Make a photo greeting card
These are the easiest and most affordable products you can make with Momento, and they take the same amount of time to create, as it takes to make a cup of tea. Choose a few photographs to feature on the front, the inside or the back of a card then add a personalised message. View Photo Greeting Card details.
step-by-step guide
1. In Start view choose Stationery
2. Then choose Greeting Cards
3. Then select your preferred Shape
 4. You will then arrive in Layout View where you can manually drag-and-drop photos from the Photo Panel on the left onto the front of a card.
5. Drop the photo where you want it to appear or use the arrows, Position and Size tools to lock it in to place. To make a photo meet the edges of the card, use the Fill Page / Set Photo As Background tool.
6. Use the Add Text button top right to insert a personalised message.

7. Place cursor into the location you want the words to appear and enter the text into the Text Box that appears. Choose the font, size, colour and alignment.
 8. To apply a pre-designed layout or to add graphic embellishments, click the Embellish icon at the top left of the software and choose your preferred embellishment pack. To add more embellishments to the software install them via the Updater Panel.
9. Scroll through the Embellishment Panel and drag a frame, background or graphic onto the canvas. The graphic will be automatically applied to the design. Alternatively, you can drag the embellishment onto the canvas then drop a photo in afterwards.
10. To design the inside or back of a card use the thumbnails at the base of the Work Area, or the arrows in the top menu.
11. Add more photos and messages to the inside or back cover then export, proof and upload your file before ordering online.
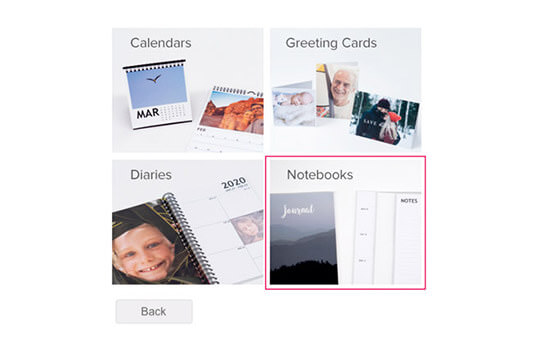
Make a photo notebook
Personalise the cover with a photo, then choose blank, Notes, Diary or Recipe pages. View Notebook details.
step-by-step guide
1. In Start view choose Stationery
2. Then choose Notebooks
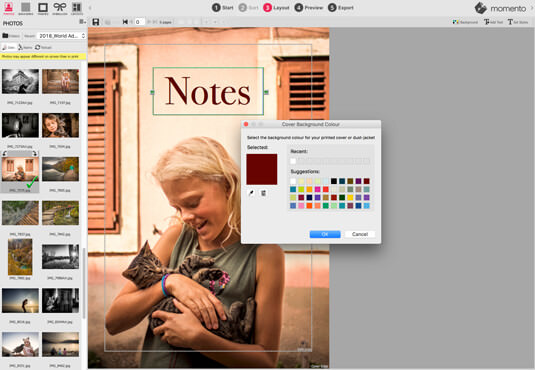
3. You will then arrive in Layout View where you can manually drag-and-drop photos from the Content Panel onto the cover your Notebook.
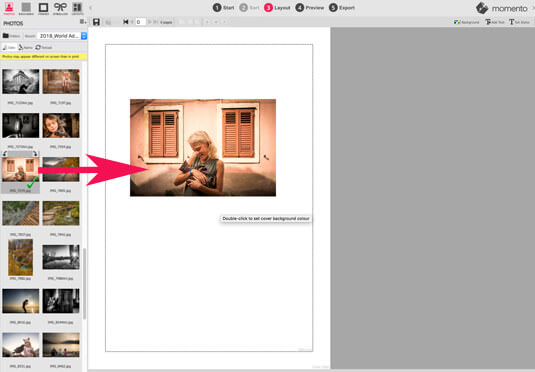
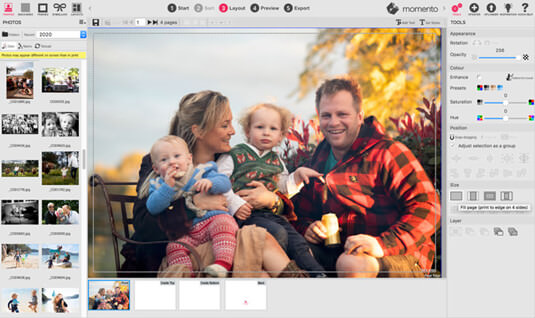
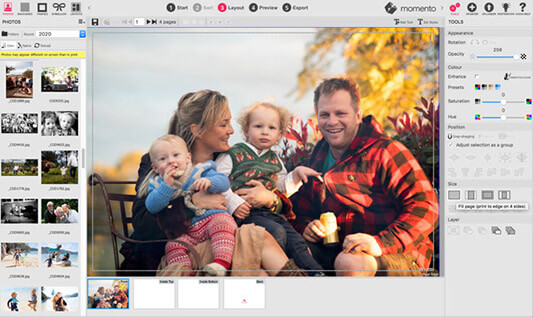
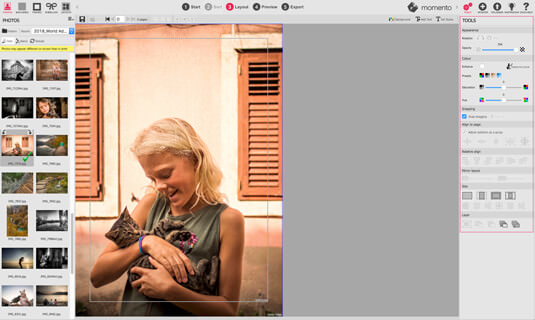
4. Adjust the position or appearance of your photo using the manual editing tools or the automated tools in the Tools Panel on the right.
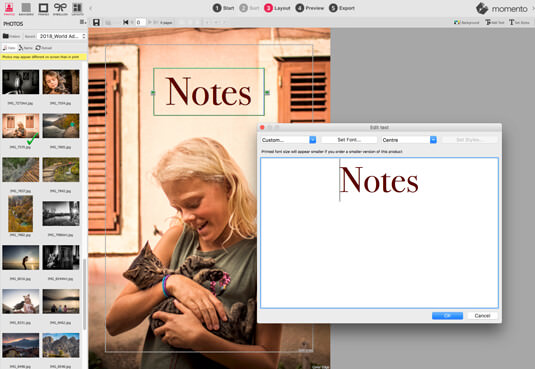
5. To add text to the Notebook cover, place the cursor into the location you want the words to appear then enter the text into the Text Box that appears. Adjust the font, size, colour and alignment via the Text Box options.
6. Choose a colour for the back cover by selecting your preferred option from the Background colour grid.
7. When your design is complete, click the Export button to move through to Export View where you will export, proof and upload your file before ordering online.
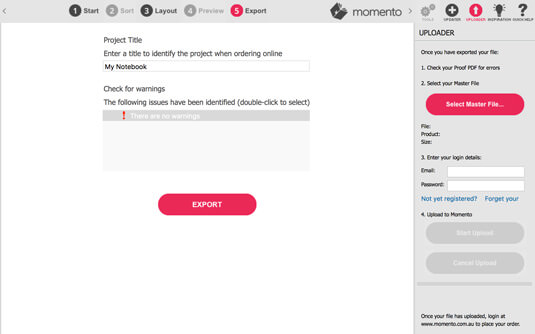
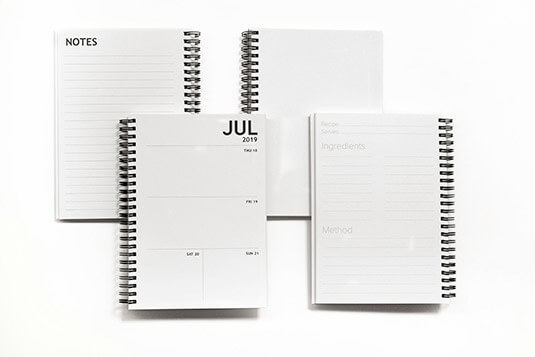
8. After the upload is complete, visit the My Projects list at momento.com.au or momento.co.nz to start your order. In the order form, choose your preferred notebook size and the type of pages to be inserted on the inside. The options are Lined, Blank, Dairy or Recipe pages.
9. Enjoy your photo notebook!
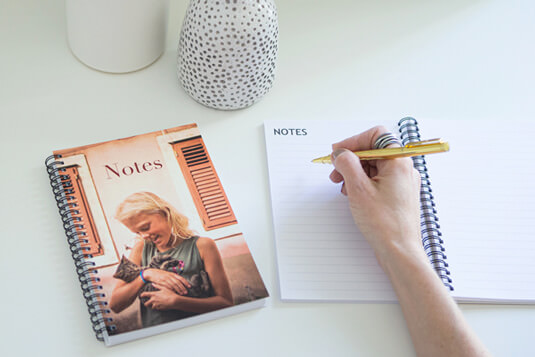

Photo Credits: Katherine Williams, Geoff Hunt, Heartstory, Claire Oliver, Angie Chiam, The Beautiful Collective, Sarah Tuck, Lina Hayes, Anya Maria Ponti