Cover View
Cover View is where you design the layout for your photobook’s dust-jacket or printed hardcover. You can design your cover just like you would a page in Layout View but you have a few more options:
- To set a background colour
- To add Spine Text
Accessing Cover View
Cover View is only accessible from Layout View via four different methods:
- Click the Cover thumbnail in the Pages Panel
- Click the Cover button at the top of the canvas
- Go to the Page Menu and select Go To Cover
- Use the Ctrl+Home keyboard shortcut
Spine Text
The spine text is the text that will be printed on the side of your dust-jacket, should you choose to buy one to wrap around the hardcover (this is selected when you place your order). It is not the text that appears on the Cover design itself, as you can add and edit that as you please.
Enter or edit Spine Text
You can enter or edit the spine text in Cover View
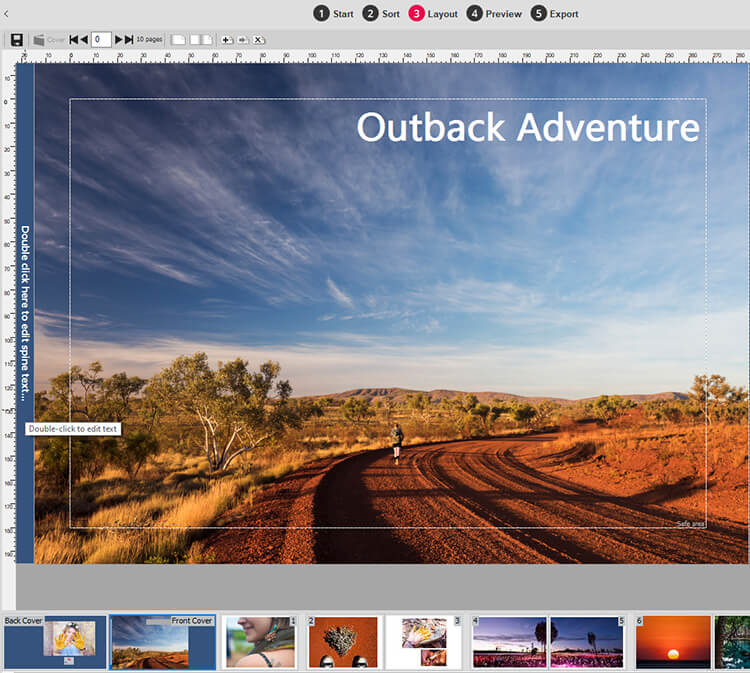
- Double click on the spine or spine text that runs vertically up the left hand side
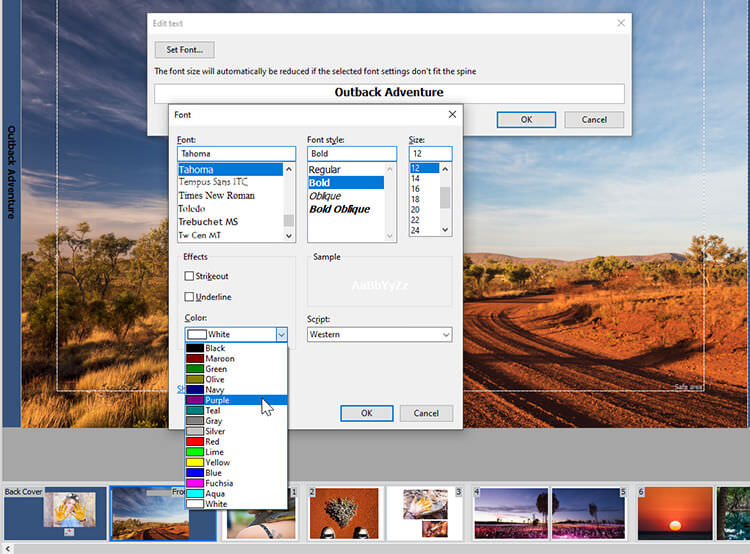
- The Edit Text window will appear
- Type your text in to the text field
- Click the Set Font button and choose your preferred font and font size from the drop down menu (The font size will automatically be reduced if the selected font settings don't fit the spine)
- Select your preferred colour from the Colour drop down menu
- Click the OK button and you will return to Cover View
Colour of Spine Text
We suggest you choose a colour for your text that is in contrast to the background to make it easy to read when printed. If you can't see the spine text on your cover design check that the colour of your Cover text is not the same as the colour of the Background. By default the Momento software sets the font colour to black and the background colour to white.
Cover Background Colour
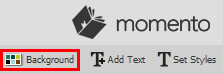
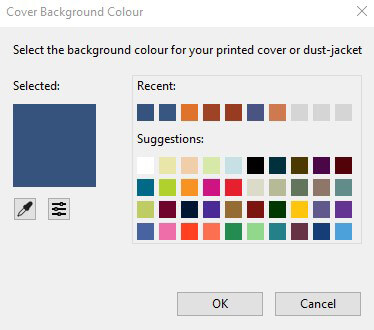
To set the background colour of your cover click the Background icon at the top right hand of the interface. The Cover Settings window will open presenting a range of colours for you to choose from or you can use the eye dropper tool to select a colour from witin the photo. Another option is to enter the RGB values
Once you have selected your preferred colour, click the OK button and you will return to Cover View. You may now need to change your font colour to make this stand out more.
Next Step ...
When you have completed the layout for your cover design, you can return to Sort View, Layout View or Export View to continue with the design or export for your photobook.