Photo book tips from our founders
Fifteen years ago we started Momento with our good mate James, because we all loved travel and photography. Since then we've all made numerous books of our holidays. The first photo book Geoff and I ever printed was a record of our holiday to Canada in 2002, where we dreamed up Momento.
Every year since we've worked hard and holidayed even harder, and this May we went to the magnificent Kimberley region in Western Australia. You'll see its beauty below mixed in with our top creation tips when using the Momento software.
Tips from Geoff -
Managing Director
Tab Key
When designing my books, I love using the Tab key - it hides all the software interface but let's you keep editing. This is especially handy if you work on a laptop or a small screen.
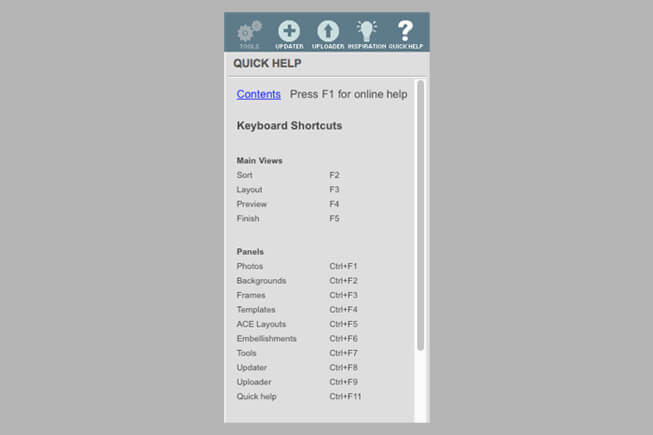
Shortcuts
Did you know ... that if you go to the Quick Help panel on the right of the software and click the Contents link, then Keyboard Shortcuts link you'll find a summary of all the shortcuts you need to speed up your design.
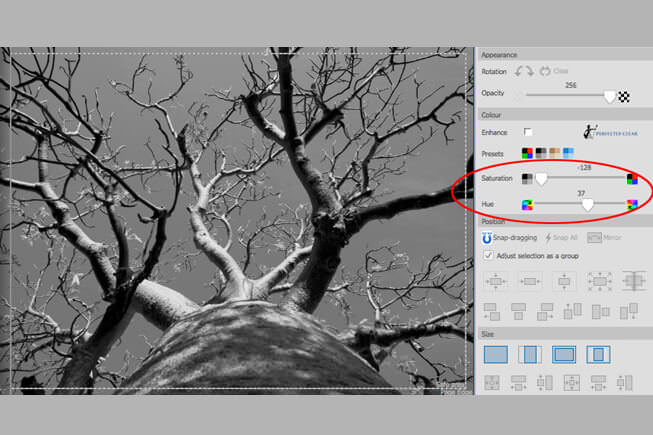
Bold black and whites
If you use the Black & White preset in the Tools panel to convert your photo to greyscale, leave the Saturation slider at the very left, then play with the Hue slider to change the effect and bring out different elements of your pic.

Tips from Libby -
Marketing Manager
Supporting content
You don't just have to include photos in a photo book. We started our Kimberley book with a map and an index listing all the places we visited to give readers a quick visual and textual overview of where we went.
Make sure you use licensed content, or as long as it's for private use only credit the copyright owner in your book. The Outback Travellers Track Guide have kindly allowed us to reproduce their map here.
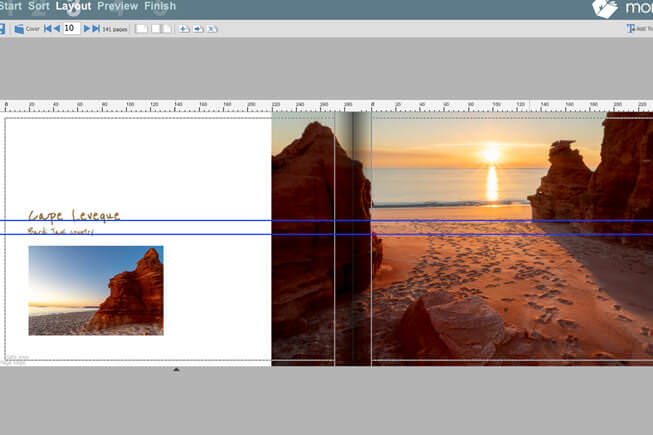
Be guided
I also like to include a title page for each destination. To ensure the text sits in the same spot on each of these pages, click and drag down from the Ruler area and a blue line will appear on the page - and across every page - so you can align everything neatly throughout the book. Guides are handy for page numbering too.
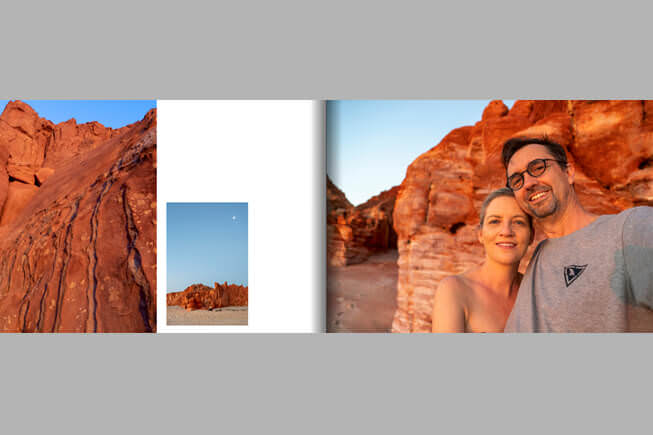
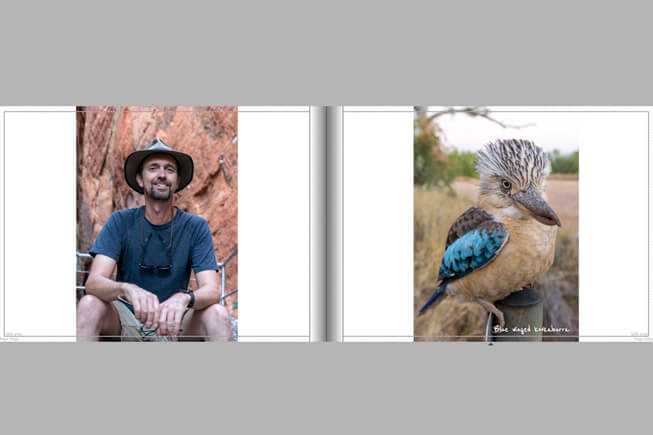
Size signifies importance
The ratio of photos on a page or spread helps the reader understand how important they are to your story. Make your hero shot sit on a page all on its own, while secondary photos can appear in a group in a smaller size.
Tips from James -
Chief Technical Officer
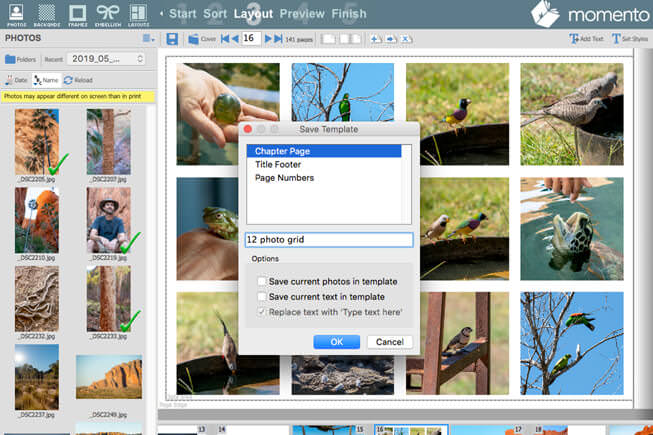
Save faves as templates
When I like a page design I often save it as a template so I can re-use it later on. They can be saved with or without text, with a photo, or a photo place-holder. You can access them at any time in the Layouts panel > Templates > Saved View.
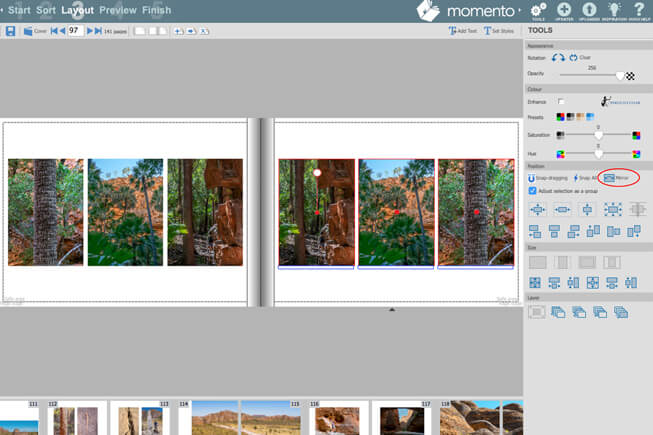
Mirror designs
Another trick for adapting a page layout you like, is to use the mirror tool to flip it horizontally. This allows you to keep the proportions while adding some visual difference.
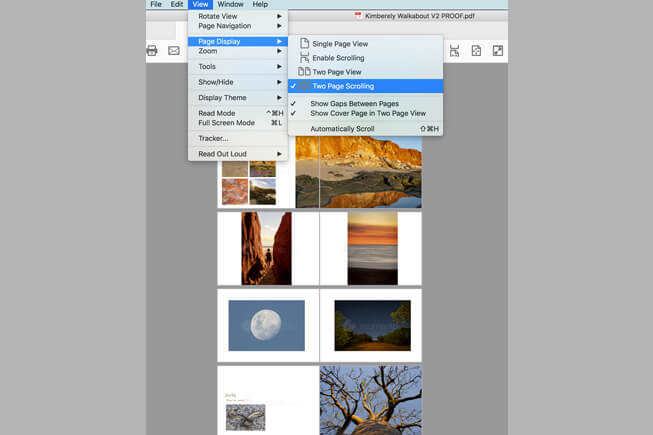
Check your Proof.PDF
I also use the time spent reviewing the Proof PDF as a way to see how the story I’m presenting flows. Problems are more obvious when scrolling through a book this way, than when designing in Layout View. For the best viewing set Acrobat Reader to Page Display > Two Page Scrolling, Show Gaps Between Pages and Show Cover Page in Two Page View.
Peak inside Kimberley Walkabout
If you want to see the full extent of our design ideas, you're welcome to flick through our Kimberley Walkabout book here. And if you're inspired by the scenery, we highly recommend a trip to this outback oasis of native wildlife, flora and fauna, with a deep connection to its traditional owners.