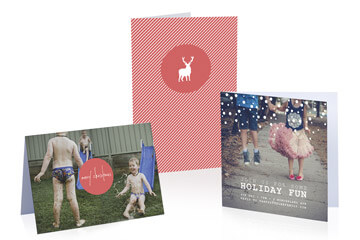
Make a photo Christmas card
Learn how to make your own family Christmas cards by dropping your fave photos into our Quickcard templates. Luxe Christmas includes colourful contemporary graphics.
How to make a photo card
See how good it feels to give and receive a photo gift! Whether it’s a photo book or photo stationery, you won't find a more personalised or meaningful Christmas present in New Zealand. It’s something they’ll be able to enjoy for years to come. The blog post below shows how a Christmas photo book gift can inspire joy, connection and a sense of history.
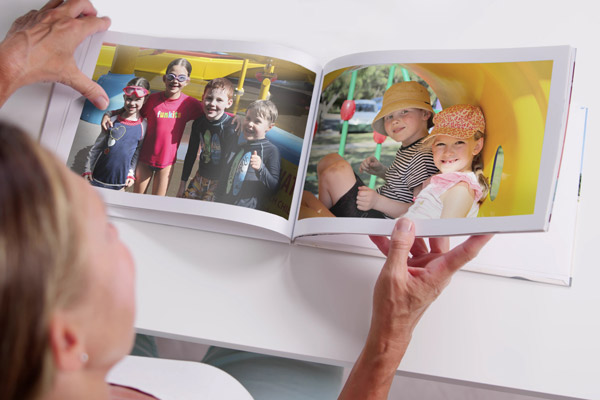
Make someone feel genuinely loved by designing a custom Christmas book gift just for them, starring their best moments. Or create a family photo book filled with your favourite photographs from the last year. Present it in a clamshell or gift box to make it extra special.
See photo book range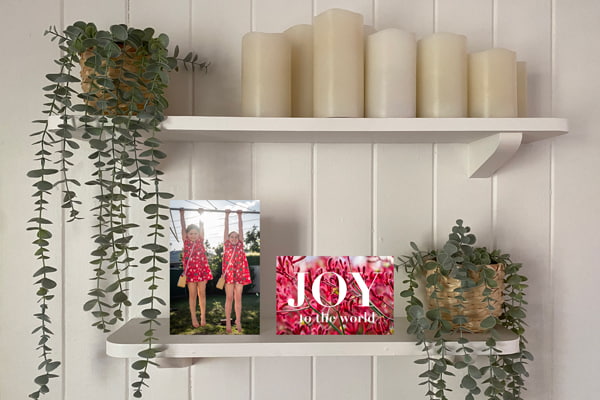
Quickcard templates and embellishments in the software allow you to say it your way in custom Christmas greeting cards that star your own photos. Regular size is the most popular, while small size is great gift tags. Thick premium envelopes included.
See photo card range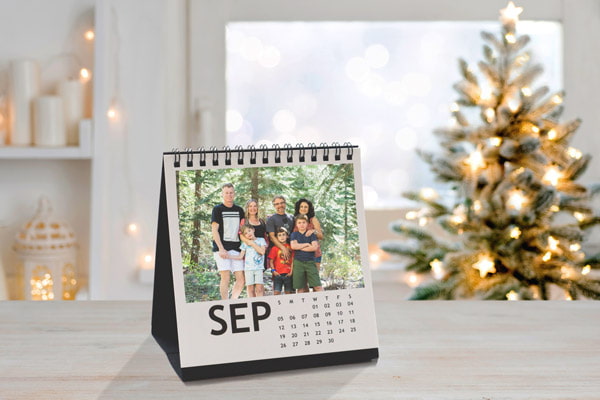
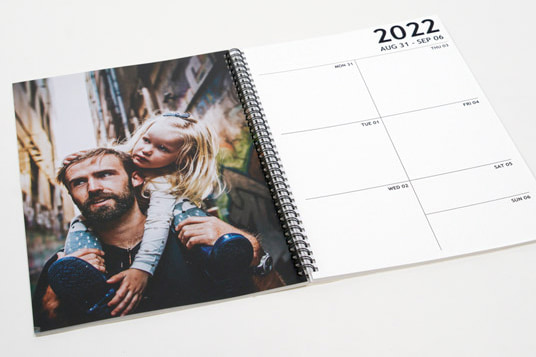
Momento’s software templates make it easy to create calendars with your photos. Just choose twelve of your best family or travel photos, and let the software do the work. The lucky recipient then gets to enjoy their present every day of the year.
See photo calendar range
For a present that takes minimal effort but has maximum impact, design a photo diary filled with snapshots of all the family. Add a headshot to their birthday, and text to highlight special events. They only take five minutes to design using our diary templates.
See photo diary range
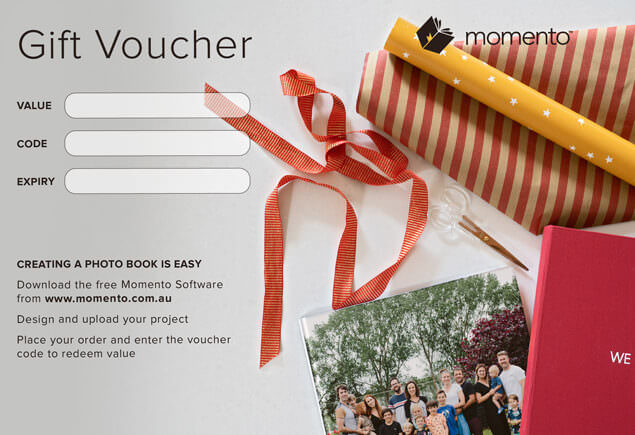
A Momento voucher gives the happy snappers and memory keepers in your life the perfect excuse to get creative. Just choose the value and we'll email it to you ASAP.
Buy a Gift Voucher
Learn how to make your own family Christmas cards by dropping your fave photos into our Quickcard templates. Luxe Christmas includes colourful contemporary graphics.
How to make a photo card

Treat your family's head chef to a recipe book starring their signature dishes. Our Recipe Book templates and Quickbooks make design easy , and they'll savour them forever.
See recipe book range
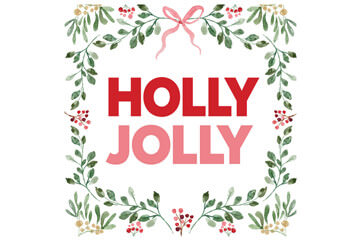
Add a festive touch to your photo books or greeting cards with graphics from our Holly Jolly, Luxe Christmas, Funky Christmas or Christmas embellishment packs.
See embellishments gallery

Family who love us unconditionally deserve special thanks when Christmas rolls around. A memory book celebrating the big and little moments you've shared over the last 12 months is a fitting gift that also becomes more precious year on year. Kickstart your design with the software’s Yearbook Quickbook, then apply the tips in our blog post to keep it quick, and picture-perfect.
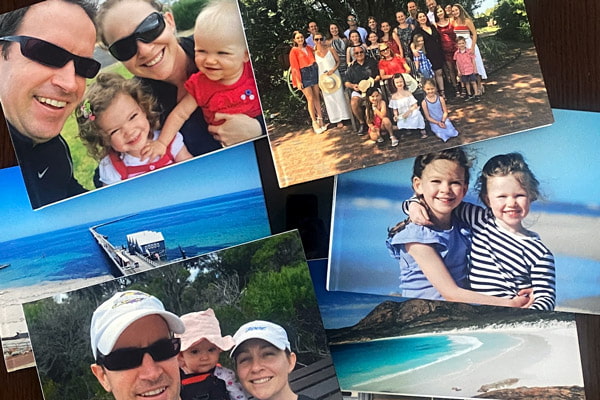
Creating and viewing a yearbook reveals your family's individual and collective achievements, as well as the invisible connections that bind you. Our top tips for family annual design are to keep it simple rather than "bigger than Ben Hur", and to make it an annual tradition like this family, so you'll have an extraordinary library to hand to the next generations.
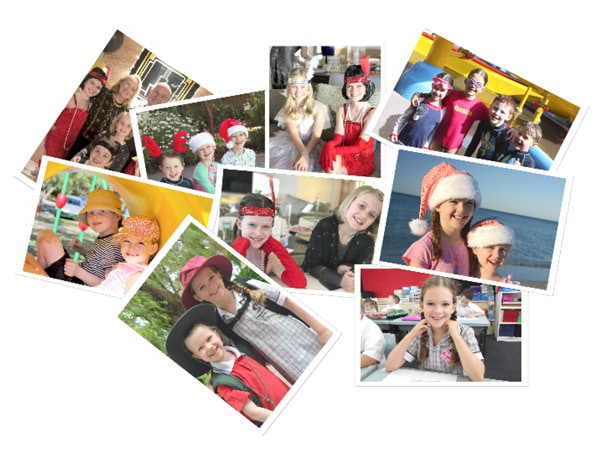
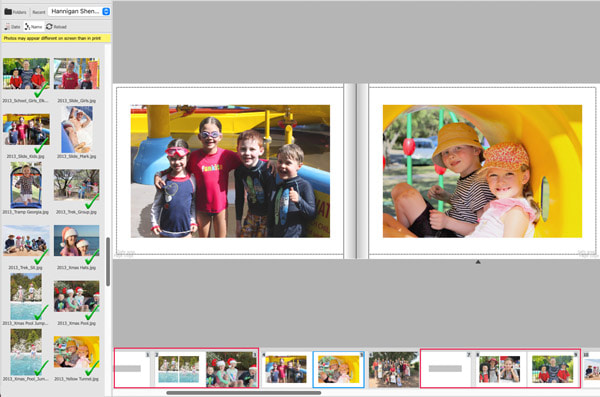
When selecting photos for the book, put your emotions to the side. Select only the best and most meaningful images, rather than dump your whole camera roll into the pages. Also ensure everyone in the household is equally represented! The uber organised will choose their images during their monthly photo review and back up session, so when November rolls around, they only have one month left to deal with.
The maximum number of pages in a book is based on the paper choosen. A Lay-flat Lustre 260g book can have 100 pages, Lustre 190g can have 150 pages, and Satin 170g or Eggshell 148g books can have up to 200. To stick within the limits, set some boundaries before choosing your photos. We suggest you aim for 100 pages with four photos per spread, approximately 200 in total. This way you'll be able to print on any paper, and get your book done without stressing.
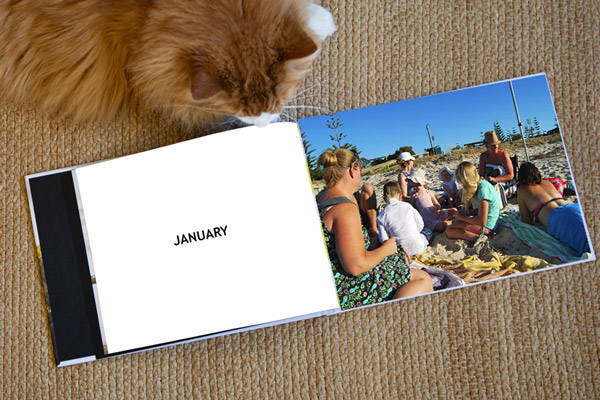
This is a multi-page template that includes a title page for each month, available in the Embellishments panel. You can always adapt the font for the monthly heading to match your personal style and introduce a colour scheme. All our quickbooks work best with one to 3 photos per page, or 2 to 6 per spread. This also fits neatly with our target of 200 photos for the book. To ensure the software runs efficiently, we recommend 300 as the maximum number of photos for any folder, but you can always add up to 12 folders to any project.
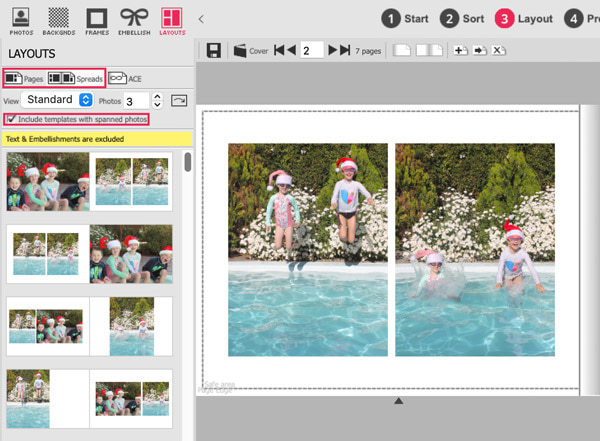
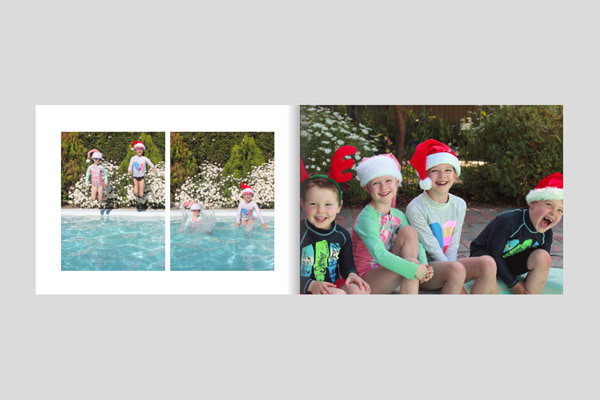
Our templates were designed to hold photos with 4:3, 3:2 and 1:1 ratios. To make things as easy as possible, the Layouts Panel presents the options most compatible with your photos at the top of the list. It's worth exploring both Page and Spread templates, and checking the Spanned Pages box so you can access the stylish layouts including photos that cross the gutter too.
To create visual consistency and a cohesiveness in your year book design, select 4 to 5 templates with varying layout styles, then repeat them each month. One spread template might allow for one or 2 hero shots, another may cater for 2 to 4 photos of the same subject or event, while another could be used to hold a larger group of photos in a visually-pleasing grid format.
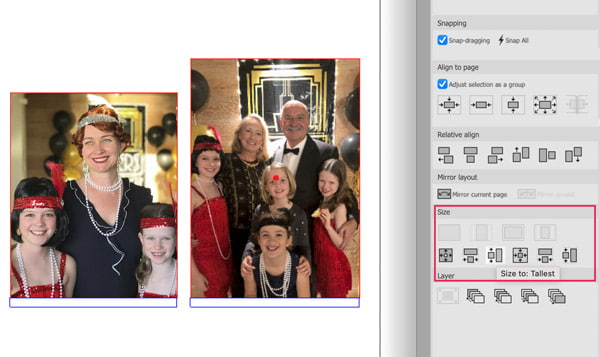
Another hot tip! If you take the time to perfect the sizing and position of your photos, you'll end up with a much slicker design. Use the Size buttons in the Tools panel, and the Relative Size option in the Layout menu to match photo sizes, or let the templates do the work as they automatically size or resize your photos.
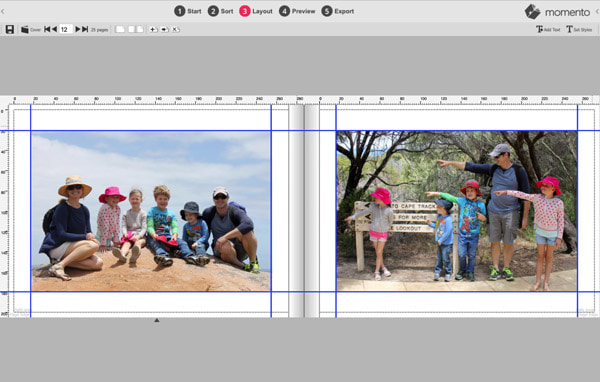
Keeping the top, base and side margins consistent across all pages of a book creates a professional-looking design. The easiest way to do this is by using templates, but for more creative control you can drag Guides onto the page and align objects visually.
Note: The latest Mac operating system has caused the Guides functionality to break, so unfortunately they will not appear. We are working to fix this problem ASAP.
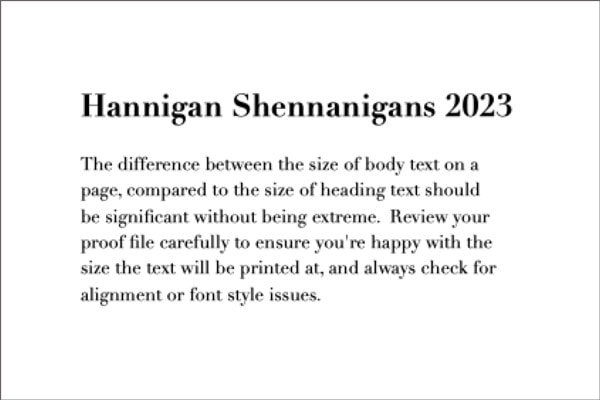
Text can make great photos look awful, but if done well it can make the whole design hang together beautifully. Be thoughtful when choosing your font and its size. For a classic look, we recommend 11 or 12 point text for large blocks of body text, and 14 or 16 point text for headings. You can always break the rules though if it's justified, for example, larger font sizes are better in books for tiny tots and older folks.
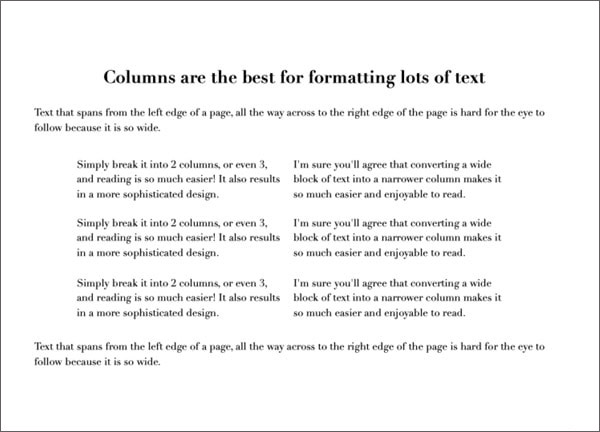
Our hot tip is to not have text span from the left edge of a page, all the way across to the right edge of a page as it's hard for the eye to follow such wide expanses of text. Simply break it into 2 columns, or even 3, and reading is so much easier! It also results in a more sophisticated design.
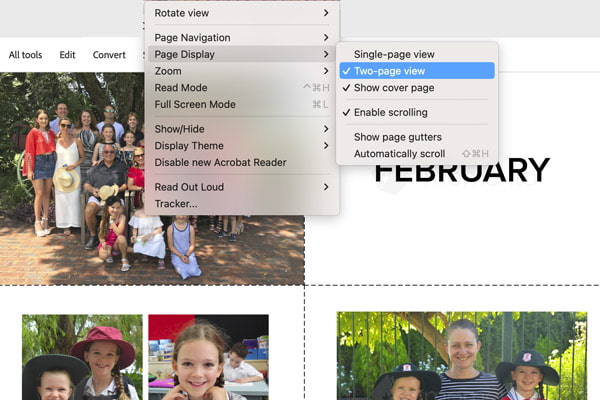
The Proof.PDF is a replica of the file we print from, with the exception of the watermark in the background. If you want the best print possible, it's essential you review your PROOF.pdf carefully as it will show up any alignment, sizing or text issues. To view the left and right pages side-by -sider, ensure the Acrobat Reader View > Page Display settings of Two-page view, Show cover page and Enable scrolling are turned on.
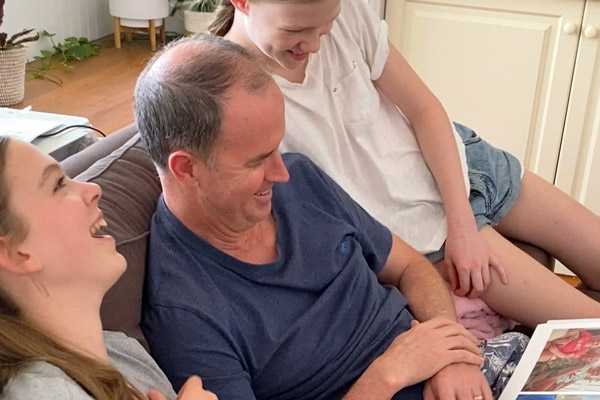
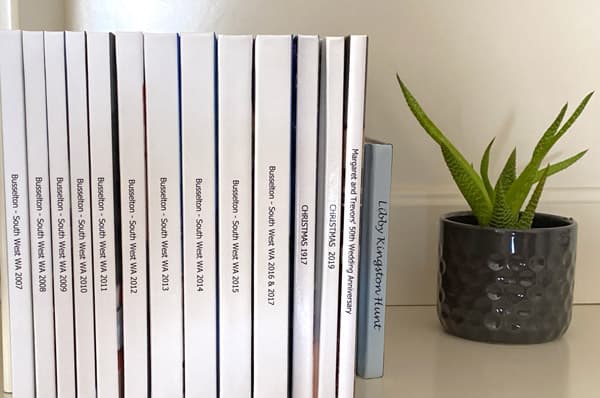
All the books in this blog post were created by a dedicated dad who has made one almost every year since his girls were born! Watching them look at their collection was such a treat. They experienced joy, connection, and a sense of self - everything we hoped our photo books would inspire! May yours create the same magic.✨
We hope these tips help you get your annual collection started, or up-to-date, and order your books by midnight Monday 13 November 2023 to enjoy a 25% discount.
Find full terms and redemption code here


Photo Credits: Bec Stewart, Claire Oliver, Svetlana Bell, Tame & Wild Studio,
Katherine Williams, Katie Takes A Picture, Cindy Power, Lynne Woolley, Ruth Gilmour